
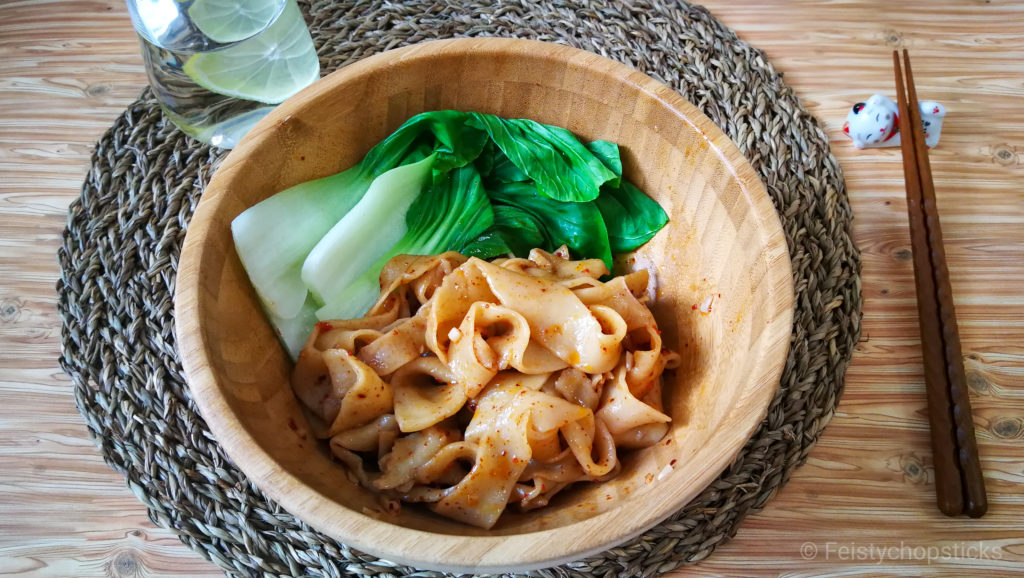
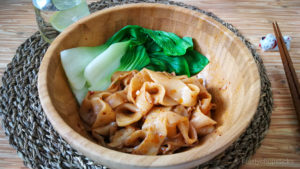
Oil seared noodles, also known as hot oil noodles or biang biang noodles, is the most famous noodle dish in northwest China. The homemade hand stretched noodles are topped with garlic mince, salt and fine chilli flakes. Before serving, smoking hot oil is poured on top to release all the flavours. The sizzling sound of hot oil and the aroma rising up at the same time makes my mouth water immediately! I add soy sauce, mix them up and serve with blanched Pak Choi. The homemade noodles has a bit of resistance to bite in, and are evenly coated with chilli oil. Here I will share my way of making this flavourful satisfying noodle dish with the simplest ingredients.

Part 1: noodle dough
Smooth elastic dough suitable for hand stretched noodles using the following five factors.
First of all, we need flour. The most commonly used all purpose wheat flour is all you need. Bread flour will work too. If you are willing to pay more attention, choose the one that contains more than 10% of protein. The protein in flour, later combining with water, will form gluten, which is THE star of today’s recipe. It gives the dough elasticity and smoothness, of course in the end the chewiness in the noodles. That’s also why I don’t recommend to use whole grain flour. The bran pieces will severely slow down the gluten formation.
Second ingredient is water. 170-210 gram of lukewarm water is required. You may adjust the amount based on your flour performance and environment humidity. I like my noodle dough to be pretty hard, so as you can see in the video, I only use 170 gram of water and my dough can barely hold together in the very beginning. The good thing about a dry dough is that as an end result the noodles are chewy. If you give the dough enough time to rest, the stretching part is easy to handle and you will get the noodles with very even thickness. But it also means kneading the dough could be hard and longer resting time is needed than a soft dough. Good news is this noodle dough is pretty forgiving, so you don’t have to be super careful. I experimented with different water amount, proving that with up to 210 gram water, the dough is still fairly tough to handle. You just need to be more careful when you stretch the dough, and also reduce the boiling time relatively.
The third essential part is salt. Glutens start to form once wheat proteins get hydrated. This process is slow, but if you add some salt, salt ions will speed up gluten binding to each other. The dough can develop more gluten in a short period.
The fourth factor is kneading. Kneading helps the weak gluten strands to cross-link and in the end, forming a strong gluten net, so the dough will be smooth and elastic. Meanwhile, hand kneading is hard work. So we have to be smart, getting the best result with minimal kneading. I don’t recommend much kneading in the beginning, because gluten need time to develop, and you can’t work on a project without material. So as long as my dough can barely hold its shape, I set it aside to let gluten form. For my dough, which is quite dry, I give it 45 minutes. If your dough is softer, the waiting time should be shorter. After resting, the dough should be very easy to get a smooth consistency during the second round of kneading. You will find the dough becomes more and more resilient during kneading or rolling out. So try not to over knead it, also give the gluten some time to relax.
That brings us to the final secret: time! Patience is crucial when you work with a dough. You have to wait until glutens are developed first. Then you have to give them enough time to relax. Fully rested glutens are elastic, giving an even smooth texture. Tight glutens are tough to work with. You either can’t stretch the dough out, or end up with broken pieces. For this recipe, the total waiting time is nearly three hours. During the long waiting, sealing the dough is very important. We have to make sure to trap the moisture in as much as possible. I use a generous amount of oil to seal both sides of the dough strips. Because of using oil here for sealing purpose, I also choose oil instead of dusting flour on working surface before.
Now after giving our dough a generous resting time, it finally comes to stretching part. I offer two ways in video: holding both ends while slapping the middle part of dough on working surface, or simply stretching a part of dough then moving on to the next section. The first way is the traditional pulling technique. Oil seared noodles is also called biang biang noodles in China, and the word “biang” mimics the sound of dough hitting the working surface. This interesting slapping movement can help gluten loose up further, and noodles can be pulled longer. The other way is simpler and more beginner friendly. My tip is working on small sections while being gentle as possible. If your dough is easy to break, let it rest even longer and try again. Anyway, the stretching part still require some practice. For the first few trials, breaking in the middle is totally normal. No one will notice that after the noodles are boiled! :-p
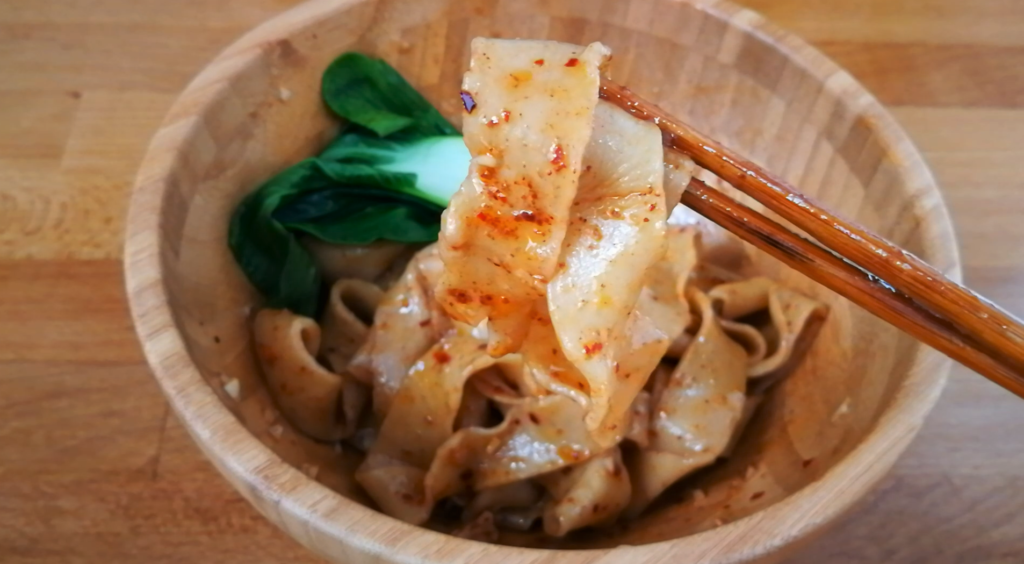
Also, don’t over stretch the dough. If the noodles are too thin, they can’t hold the shape as well as the texture. The best homemade noodles should have a bit of resistance when you bite in. In my opinion, the final consistency of noodles is decided by four things: dough hardness, resting time, stretched size, and boiling time. If your dough is softer in the beginning, or you stretch the dough thinner than mine, you may need shorter cooking time.

Part 2: blanched Pak Choi
The secret of making perfect blanched Pak Choi, or any kind of blanched leaf vegetables, is time. Leafy veggies are usually edible raw and easy to cook through. So when they obviously turn to dark green and become soggy in boiling water bath, you probably already overcook them. Then they will be bitter and tough to bite in. Even after you drain them, the residual heat will continue cooking the inside unless you soak them in cold water. I prefer no cold water bath for this dish, because the noodles are hot when you serve them. So please prepare yourself to drain the Pak Choi when you think they aren’t cooked yet. I use 5-6 pieces of Pak Choi for one person, which I blanch for only 20 seconds! Another trick is adding salt to boiling water first, which will prevent the leaves to turn brown. You can also add a few drops of cooking oil to give some nice glaze on the leaf surface. For a precise control, I like to dip in the stem part first for a few seconds, which can make quite a difference for Pak Choi. That is how I make a sweet, crunchy, juicy, almost buttery (my friend’s words) blanched Pak Choi.
Additionally, you can use spinach or lettuce as well, but the blanching time should be even shorter.

Part 3: seasoning
As you can see in the ingredient list, the seasoning for this noodle dish is definitely minimalistic. Garlic provides aroma. Chilli flakes gives spiciness. Soy sauce and salt bring savoury and hot oil holds them all together. It’s said, the most original recipe is even without garlic. This is a symbolic dish of “less is more”. But there are still a few tips to make those simple ingredients work better.
Firstly, speed up. After boiling, the noodles can not be flushed with cold water, otherwise the seasoning oil won’t coat on. Good news is our dough should be hard enough, so the noodles won’t stick together easily even after boiling, as long as you don’t overcook them. What you need to do here is speeding up. Make sure you have already prepared minced garlic, chilli flakes, salt, soy sauce, cooking oil and the pan for heating oil. Blanch Pak Choi before boiling noodles can help too. As long as you drain the noodles, start to heat up oil immediately.
Secondly, the oil has to be smoking hot. We need the high temperature to “temper” chilli flakes, so they can infuse as much flavour and inviting red colour as possible. The hot oil also helps to reduce raw garlic smell and maintain the nice aroma.
Thirdly, type and amount of chilli flakes. I find my chilli flakes in Chinese dry seasoning section in a local Asian store, which contains both dried chilli skin and seeds. The seeds, in my opinion, are essential to provide an authentic aroma, but they could be too spicy for some people. It’s better to try it before hand and make sure you can handle it first. You can also reduce the amount to ½ teaspoon for the first time. Otherwise, Korean chilli flakes are milder and sweeter.
-
Is there any shortcut?
This time consuming recipe has to have a shortcut, otherwise I’m afraid not many people want to try it, lol. Actually, this noodle dough is great for freezing. I always make a big batch of dough. After kneading to smooth, separate them into desired portions and freeze individually. Each time I want to have noodles, I’ll transfer a portion to the fridge one night before. When I prepare dinner, I’ll roll the defrosted dough out, cut it into strips, and seal them with oil, just like treating a fresh dough. Then I’ll wait for the dough coming back room temperature, about 20 minutes, so I can start to pull and boil them. The glutens in the dough get fully rested during freezing, so the two hours resting time can be severely shortened. You can defrost it at room temperature too. Just make sure it fully defrosted before rolling out.
-
Why plastic foil?
I would prefer to not use plastic foil, but I haven’t found a good alternative yet. I have tried sealed container, wet kitchen towel and beeswax wrap, but none of them give the same performance. If you have any good sustainable option, please let me know in the comments.
Oil Seared Noodles
- January 3, 2020
- 4
- 3 hr 45 min
- Print this

Ingredients
- Noodle dough (4 servings):
- All purpose flour 400g
- Water 170-210g
- Salt ½ tsp
- Other ingredients (1 serving):
- Pak Choi 5-6 leaves
- Minced garlic 1 clove
- Salt ¼ tsp
- Chilli flakes 1 tsp
- Oil 2 tbsp
- Light soy sauce ½ tbsp
- Balsamic 1 tsp (optional)
Directions
- Step 1
- Mix the flour and salt.
- Step 2
- Slowly pour in 150g of water first while mixing. When most of the flour is combined with water, start to knead with hands. If your dough is too dry, gradually add in water. In the end, the dough should barely hold the shape, while your hands and container are clean.
- Step 3
- Wrap the dough with a piece of plastic foil and let rest for at least 45 minutes.
- Step 4
- 45 minutes later, knead the dough again for 2-3 minutes. Now the dough should quickly become smooth and even. Cut the dough into halves, one piece for two servings.
- Step 5
- Roll the dough out into thick disks while keeping the smooth surface as much as possible.
- Step 6
- Take a dough disk and start to roll it out into a rectangle shape. After a while you may find the dough is hard to roll out further. Then add some oil to the working surface. Keep on rolling out until you get a rectangle dough sheet with 2-3 mm thickness. During the whole rolling process, if you find the dough becomes too resilient to work with, let it rest for 15 minutes.
- Step 7
- Cut the dough into 2-3 cm wide strips. Then generously oil both sides and let rest for two hours. During the waiting time, you can mince garlic and wash Pak Choi.
- Step 8
- Two hours later, start to blanch Pak Choi. Add a teaspoon of salt to boiling water to help maintain green colour. Hold the leaf part together and dip in the stem part first for 10 seconds, then whole leaves for another 10 seconds. Take them out and set aside.
- Step 9
- Gently stretch one piece of dough into desired length and thickness, and drop it into boiling water. Repeat the process until all noodles are pulled. For a more relaxing way, you can place the pulled noodles on a large surface first. Try not stack on each other. Then boil them together when you are done all the pulling.
- Step 10
- Boil the noodles for one minute after the last piece is in water. You can pour in some cold water to cool down a heavy boil. Also stir occasionally, so the noodles could maintain gentle movements in bath without sticking on bottom.
- Step 11
- Drain the noodles and place them into a bowl. Do not wash noodles after draining, otherwise the seasoning oil won’t coat on.
- Step 12
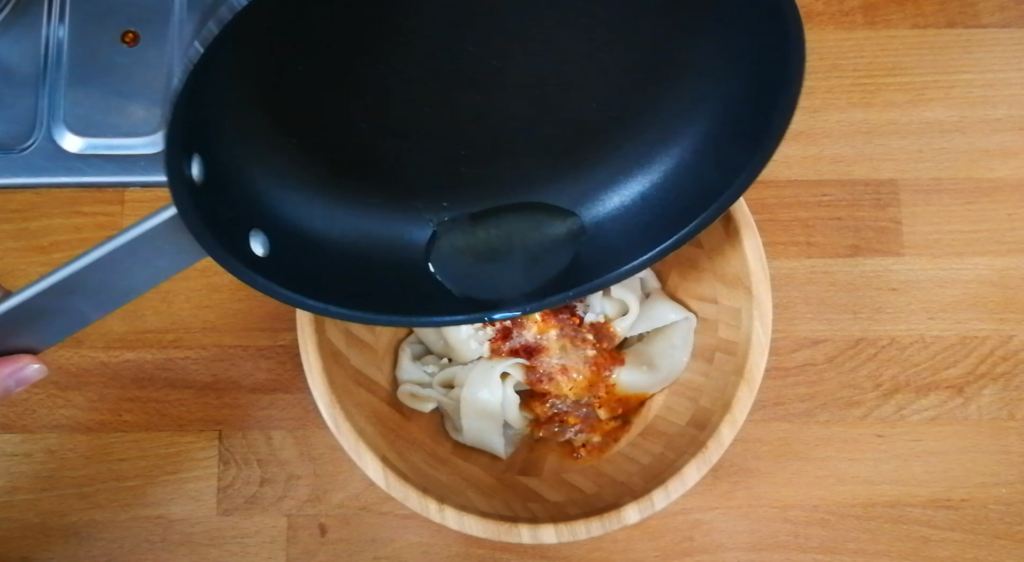
- Immediately heat up two tablespoons of cooking oil over high heat.
- Step 13
- Place minced garlic on noodles, then ¼ teaspoon of salt, followed up with one teaspoon of fine chilli flakes on the very top layer. Pour the smoking hot oil over the seasoning pile to release the flavour.
- Step 14
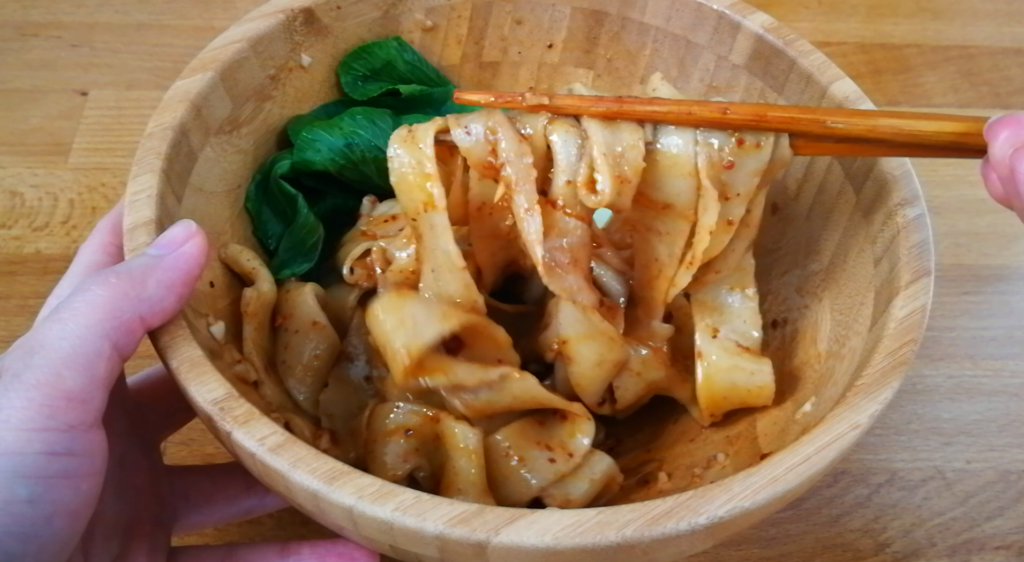
- Add in half a tablespoon of light soy sauce, optionally one teaspoon of balsamic vinegar. Then mix all together until the noodles are evenly coated with seasoning chilli oil.
- Step 15
- Put blanched Pak Choi on the side, then enjoy it!